


A great number of people have a motherboard in their PC using this module. It is for them that I wrote this short, but brief, corrective article.
Most PCs run problem free for years, but for some, like mine, they encounter
a multitude of error messages and system problems that I have
clearly identified as eminating from this module. Most people
would have merely replaced the motherboard, but being one to save some
time,
money, and headaches reconfiguring my PC, I found a quick and simple,
yet and inexpensive way to resurrect my motherboard.
PC Chips/Houston/Amptron motherboards, to identify just a few of the
names that these motherboards were sold under, are great motherboards.
They've served me very well over the years, providing an excellent
price/performance ratio, and were always easily obtainable.
The only problem that I found with a great number of these motherboards
manufactured during the early 1990's was that they contained no
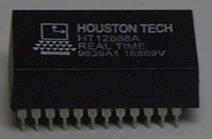
CMOS battery on the motherboard. Initially I thought that the Houston
Tech RTC module contained a NVRAM chip, but as my PC started to
demonstrate a multitude of problematic signs, opening this module revealed
a different story.
Pictures speak a thousand word, and so the pictures below should give
you most of the information you need. What the pictures don't tell
you, I have written down.
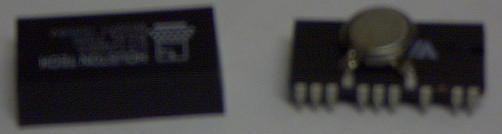
The whole assembly is merely a plastic cap placed on top of a coin cell button battery soldered directly to two of the chip pins.
PLEASE NOTE:
CUT THE OLD BATTERY SOLDERING TABS BEFORE REMOVING
THE REMAINDER
OF THE BATTERY LEADS FROM THE CHIP PINS.
OTHERWISE, YOU WILL PROBABLY BREAK OFF ONE, OR
BOTH OF THE FRAIL CHIP PINS.
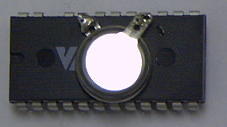
Now, unsolder the remainder of the battery soldering tabs. Be very careful not to break the chip pins as they are very frail.
Now, locate a pile of old computer parts, or a local used computer parts store, and obtain onr, or both below items.
The first item will be any old dead motherboard that still has the button
cell battery holder still soldered to it. Most places give them
away or charge you $1-$2 USD for it. Short of this you can also
buy a new one for about $3-$5 USD. I quickly located one on an old
motherboard and unsoldered it carefully. Too much heat and you'll
melt the holder. Too little heat, and too much force, and you'll
quickly
break it in pieces.
The second item will be an old 4 X AA cell battery holder holder or
speaker. On old 286 and 386 motherboards, NiCAD batteries were
soldered directly to the motherboard to hold the CMOS settings.
After a few years the battery would corrode away or just stop working.
These battery holders were primarily used to replace this CMOS battery.
I found one in my scrap pile and cut both wires off.
Using a soldering iron, I made a small hole in the top right corner
of the right side of the plastic cap and slid both wires through it.
As the
coin cell battery outside casing was the positive (+) connection, I
soldered the red wire to the corresponding chip pin. Then I soldered
the
black wire to the corresponding negative (-) pin on the chip.
Just in case something goes wrong in the future, DON'T epoxy or glue the
cap back onto the chip. Two very small lines of silicon on the
underside of the cap at both ends are good enough to hold the cap on snug.
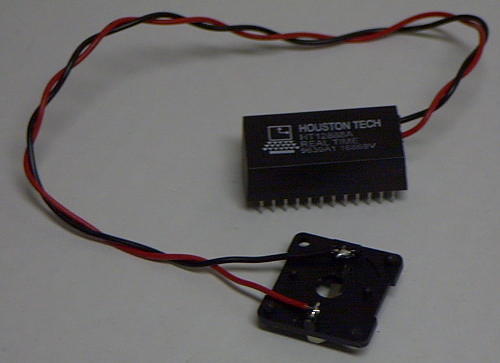
On the battery holder, bend back both contacts as far as they can go,
without snapping them off. Then solder the red wire to the outside
battery holder contact, and the black wire to the middle battery contact.
To insulate the battery holder from the metal on the case, either use some silicon or some double sided tape to mount it inside the case.
A new battery should run you about $3-$5 USD. A standard CR 2032,
CR 2025, etc., can be used. As long as its' a 3V lithium type, it
should work just fine.
Once everything is together, you can reinsert the module onto the motherboard, place a battery into the holder and you're almost done.
Now power-up the motherboard, set the CMOS settings, and the motherboard
should run for quite some time again. You may need to
clear the CMOS settings using the onboard motherboard jumper.
|
|
|
|
|
|
|
|
|
|
|
|
Thanx, I hope this old trick works well for you, and spread the news.
Don't forget to checkout the website for
This is where you'll find great deals on computer,Giulio Moro Bargains
electronic, automotive, and consumer related items.
Oh, I almost forgot! Don't forget to checkout an affiliate
website offering some other great values for comsumer
and computer related items at !
Thanx, and take care.
For email contacts, please use: sales , webmaster , or Giulio Moro himself.